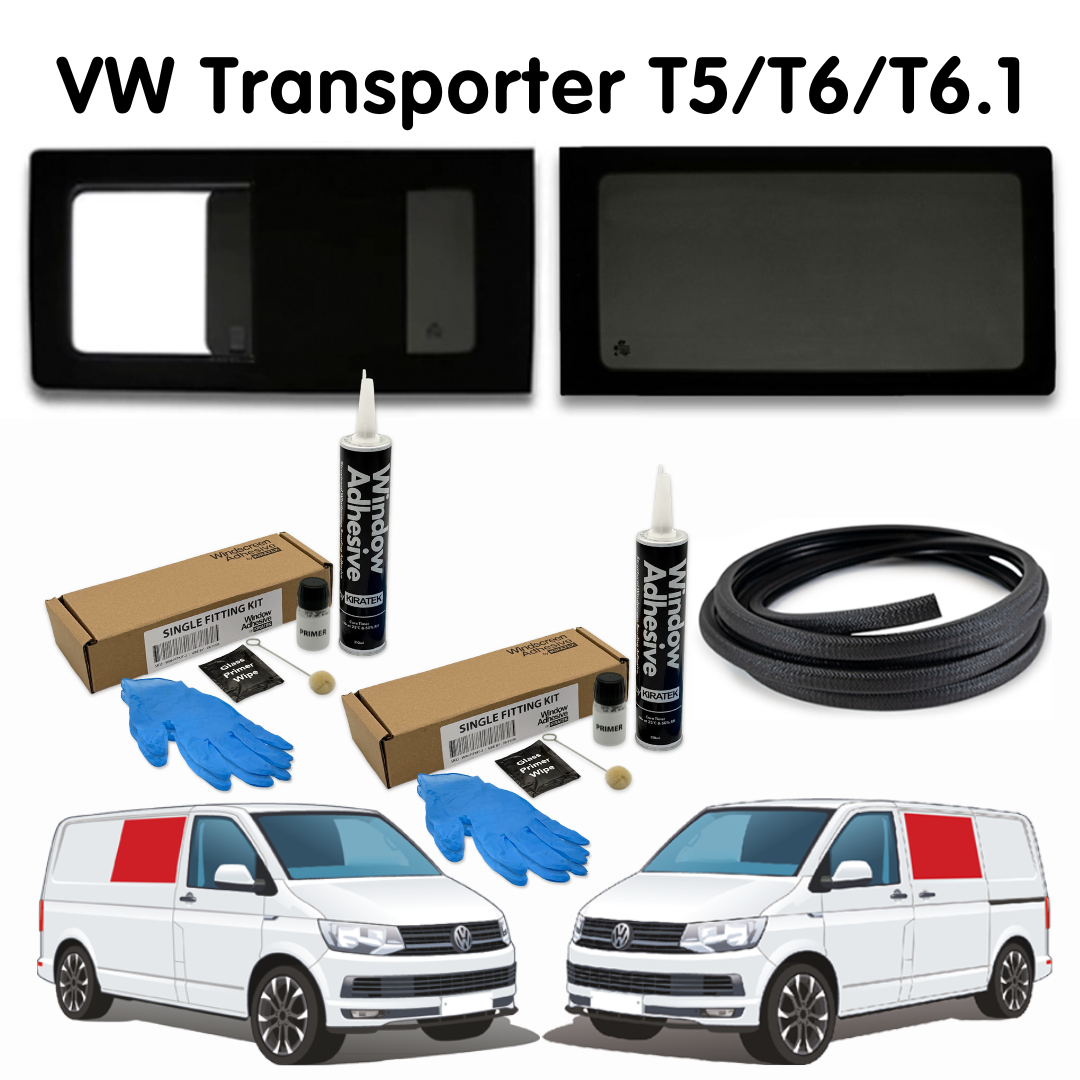
We stock a range of privacy windows for the T5, T6, Vivaro, Trafic & Ford Transit Custom. Click here to view our collection
Our advice when fitting anything to your camper, is always that if you are in any doubt about your own ability to carry out all the steps, then it's a good idea to get a professional to complete the job for you.
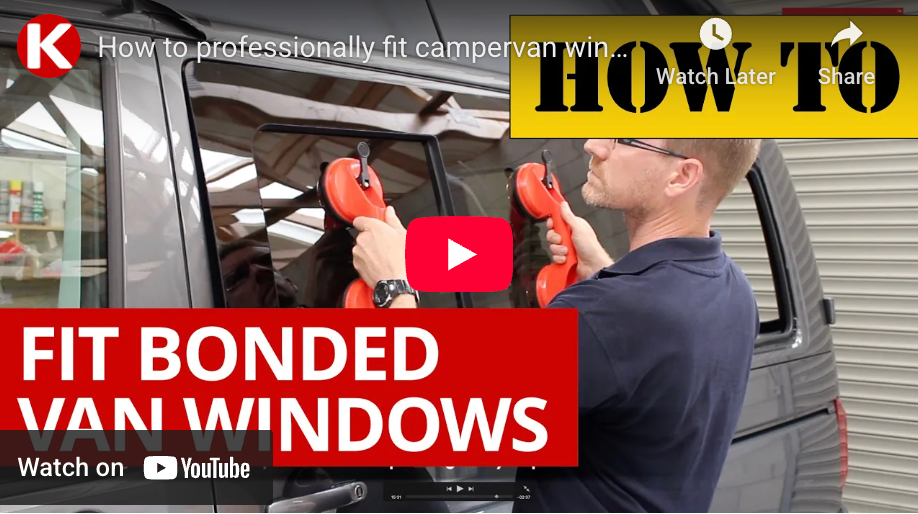
Video Transcript
Hello and welcome to this video in the Kiravans series of how to convert your campervan.
Today we're going to be looking at fitting van windows into our project van, which is a VW T6 short-wheel base.
First of all, we're going to go through a bit of an overview of how to do the job. Then we'll look at what tools you may require and also the materials that are going to be involved.
Now, like anything in campervan conversion, there are lots of opinions on how to do different things. What's the right way? What's the wrong way? We're just going to focus on the way we recommend fitting windows using the products available on the Kiravan's website. Let's have a quick look inside the van and get a general overview. Then we'll go through it in more detail.
Now, these windows are called bonded windows, because they basically get stuck onto the van. What we need to do is cut out a hole in the metal panel, leaving a couple of inches all the way around. It's not as bad as it sounds, because on the inside you've got an inner skin, which actually dictates the line that you cut, so you can't really go wrong.
Once you've got your hole cut, finish off your edges with a bit of trim. Then we put a bead of adhesive all the way around the hole. Then, it's simply a matter of grabbing the glass and sticking it on. Now, on the back of the glass you'll see this is the bit that you can actually see through, but on the outside there's a solid ceramic band and this is the bonding surface. It actually adheres to the van. Let's take a look inside now.
As you can see, inside the van here we've got the outer metal skin and basically the inner metal skin, or framework, that goes around it. This dictates our cutting line. We literally just follow this all the way around. Then we need to cut a nice straight cut across here, and up here, to take out that central strut as well.
Okay, now, the first stage is going to be cutting out holes for the windows. For this video I'm going to go through and use a range of different tools and give you some feedback on how I find each one performed. Hopefully, you'll have one or two of these at home that you can use. Just to go through quickly, a standard drill with a metal hole cutting set. It's quite a good way to do the corners, if you want to do that. A jigsaw is very useful for cutting out the bulk of the metal work. And a mini grinder, as well. Now, this one I've got a thin cutting disc on. I also used a slightly thicker grinding disc. Other tools, reciprocating saw, if you've got one of these, this can work. Also, going to try using the compressor tools. This is a little air saw and a nibbler. When I was converting vans for a living, this was the tool I used all the time. It's a set of power shears with a little oscillating blade. You probably don't want to go out and buy one of these, because I think they're over 200 quid.
I'll go through this range of tools and let you know how I got on. In terms of materials, obviously, you're going to need your Kiravans windows. Kiravans window fitting kit, which comes with some adhesive in it, some glass activator, some primer, some dabbers, and the little nozzle, and a pair of gloves, and some instructions in there. You're going to want extra adhesive for anymore windows that you're going to fit in. A range of hand tools, adhesive gun, a glass suction pad is really useful for when you want to offer the glass up to the van. Some face protection, some degreaser, some window cleaner, you're going to need some U-profile edge trim, and a few other hand tools. Let's get started with cutting the holes.
Now, before you cut any holes in your van, we really recommend that as soon as your windows arrive you unbox them to check for any damage. Take off the protective plastic wrapping. Get some window cleaning agent, give them a good clean on both sides. Give them a thorough check over. If there are any spots of adhesive on the glass, left over from when they put the sliding panels in, that can be removed with a degreasing agent. Then once you're completely satisfied with the glass, you can start cutting. If there are any problems, then Kiravans will certainly swap them over without any quibbles.
Once you're satisfied that your glass is in good condition, nice and clean, you can get on with protecting your van. We recommend getting a sheet of polythene, or something like that, taping it along the bottom to protect the paint work below where you're working. Then right around the corners, around the window openings, we also put a double layer of masking tape, just to be doubly sure that no exposed paint work will get scratched in the process.
Now, most cutting tools won't be very successful to get through the outer skin, and the central strut at the same time. So what I'm doing here is using a mini grinder. I've just marked a straight line along the top and the bottom. I'm cutting out the top inch, or two of that metal strut and the same along the bottom. That will enable our jigsaw to cut out the bulk of the metal panel without jumping. Once we've got rid of those two bits of metal, I'm just putting a dot in each corner, about 10 millimeters in from the corner, and with a drill bit, drilling through from the inside to the outside. Then go outside the van, and with a straight edge, just join up those dots with a permanent marker. This is going to mark our rectangle for cutting out with the jigsaw.
Get your safety kit on. I've stuck a handle in the middle, because I'm doing this on my own. You may well do it on your own as well, so it just means the panel is not going to fall in and scratch anything. As I cut, I'm cutting along, but I'm stopping about five millimeters short of each hole, so that the corners remain connected. Just take care that the base plate of your jigsaw doesn't scratch any exposed body work. Now, as I do my final cut, I'm going to cut right to the holes. Then trim off the last little bits in each corner and remove that panel.
Now, when it comes to cutting out the remaining inch, or two, of metal, you can use a jigsaw. It's quite tricky to get around the corners. I gave it a go here and was reasonably successful. You just have to take your time and keep looking inside the van and following that line of the inner skin of metal. Another option I tried was to use an air saw with a very fine blade. It's quite tricky to keep straight, but it did handle the corners very well. If you have a compressor, then that's another option. If you've got access to a hole saw and a drill, then this is quite a good way to do the corners. You can go right into the corner. It creates a nice curve for your cut and it means that you then just have to cut along the straight edges. For this one, I've left that central strut intact, because I'm going to use a fairly powerful reciprocating saw and that will cut through both skins of metal at one time. This is just another option.
With the tools at home, I'd probably recommend that you use a hole saw to do the corners, cut the top and bottom bits out with a grinder, and then use a jigsaw.
Using the air nibbler was reasonably successful and it did produce a nice smooth cut. It doesn't go in corners well, so I removed the corner material. But what I did find, once I cut out, was that it actually left three, or four, millimetres of metal all the way around, which I then had to get rid of. Finally, this is the power shears in action. As you can see, they produce a nice quick clean cut. Just be careful that any metal you trim off doesn't scratch the paint work of your van.
I've cut all the metal panels out of the side of the van where I want to fit the windows. We're left with a fairly sharp metal edge here. I've gone along with the angle grinder, taking off any high spots. Being careful where the sparks go and avoiding contact with the van. And then giving it a light rub with some sandpaper.
Next thing we've got to do is rust proof that edge, so that it doesn't start to corrode. To be honest, I've always used a bit of the primer with a little dabber. That just seals it all in, makes sure no corrosion is going to occur. Then after that, we grab some of our edge trim and knock that on before we actually stick the glass on.
When it comes to edge trim, there are a variety of different thicknesses you can get. At present we sell a thinner one and a thicker one. This is a thick one I'm putting on here. Now, historically, when I was fitting windows I would always use a Stanley Knife and cut out the rubber pinch wells between the two metal skins. Then re-bond the skins together and use the thin edge trim to hold them back together again. But, actually, a few converters have said, "Well why don't you just use the thick one, which will go over both skins as it is?" So that's what I've done here and it's worked really well.
Now we're ready to start prepping the vehicle for bonding.
Get some degreasing wipe and give it a really good clean around the paint work where the primer is going to go. Make sure you get rid of any polish or residue that's on there. Then give it a final wipe around with some glass activator. Give your little bottle of primer a good shake for 30 seconds to a minute, to get the little ball bearing moving. Then load up your cotton dabber. Now, we're just going to follow the line of the knock on trim all the way around the window, starting here. If you can do this in one continuous movement, it's recommended. Because they say if you start painting it on with forward and back strokes, you'll not get such a clean bed of primer on there for the adhesive. This has gone all the way around. When I get to the top corner, I'm going to go slightly outside where I first started, because that's where my glue/Winbond adhesive is going to create a waterproof seal, as you can see here. Same on the barn door windows.
Next, we are going to use the glass activator and give that a decent wipe all the way around on the ceramic band of the window. Now, this is a good time to dry fit your windows, just make sure there's no high spots in the frame that it's going to rock over. This rear quarter window is a little bit high in the middle, so I'm just going to take a rubber mallet and tap in the body work a bit. This will just make sure that when you stick your window on it's going to sit flush against the van body. Now you want to use some kind of tape that's not stretchy. This is going to hold your window in place. I'm just putting a couple of loops on the top of the van. Now, offer the window up, get it roughly in the right place. You just want to try and get the gap, top and bottom, to be about equal.
Then I'm going to go inside the van, and with a pencil, just follow the line of the edge trim. Now, this is really just so that I can take the window off again. And, it will give me my line for where I need to put my primer. I've used a little bit of the edge trim just so that I can gauge how far outside that line the actual adhesive is going to go. Then similar to what we did on the actual van body work, we're going to paint a continuous line of primer just outside our pencil line, leaving a gap for the trim, as you can see here. In theory, that's going to be where our adhesive is going to contact the window. By using our pencil line as a guide, it just means that we're not going to have any primer visible inside the vehicle, on the inside of the glass.
Now, your adhesive is going to come in one of these sealed canisters. First thing you've got to do when you're ready to load up your gun is pull the ring-pull on the back, pop that off, take out the little silicon cartridge. Then, with a screwdriver, you need to puncture that metal work on there. Then screw your nozzle on. Take the end off your mastic gun. Then simply drop the cartridge in, get the nozzle pointing the way you want, and then squeeze like that. Now, if you're doing this job in winter time, bring your glue cartridges indoors so that they can get up to room temperature. They'll be a lot easier to squeeze out of the mastic gun.
Now we're ready to start applying the adhesive to the van. On this side, I'm starting on the top right-hand corner, just below there, and working my way down keeping the nozzle right up against the plastic window trim. It just forms a nice perimeter of glue all the way around. When I get back to my starting point, I'm just going to feather outside my starting point. That will make sure we get a nice waterproof seal, so any water running down from the top isn't going to creep in. Because I'm doing two windows on this side, I'm doing the mastic body adhesive around both windows so that I can stick them both on at the same time and make sure they're perfectly aligned.
You simply offer the glass up like this to get it roughly in position. I'm not pressing down too hard at this stage. I'm just going to take my tape loops down to hold the glass in place. You want to aim for a uniform gap all the way around the window. Then I get both bits of glass on. Just do some minor adjustments and then start to press evenly and firmly all the way around to make sure the whole window gets in contact with the adhesive. The important bit is where the two bits of glass join in the middle. You want to get that a nice uniform gap. Same situation on the barn doors really. This time I'm starting in the top left corner, going around clockwise. Then when I come to my finishing point, I'm going to feather inside my starting point.
Now, I'm doing all of this with one tube of adhesive and I nearly get the second window finished, but at this point it runs out. As long as you've got another tube ready to go, you can simply take that one out and put the next one in. Then make sure your adhesive joins up with where it finished off. Now, this stuff is moisture curing, so the more humid the day the faster it's going to go. But it will still take five or 10 minutes before it skins over, so you've got a bit of time to get your glass up. Just make sure your gap is uniform and your top, and bottom, corners line up.
Once you've got your windows stuck on, it's best to leave them for a couple of hours to let the adhesive go off.
One final word, remember not to slam your doors before it has gone off, because it is possible to blow them back out again.
There you have it. That's how we recommend sticking bonded windows into your VW panel van. Now, in terms of time to do the job, I'm guessing it will probably take a couple of hours per window. I know when I was fitting windows for a living, I was able to glaze a whole van in a normal working day.
If you do have any more questions, please get in touch via the website or call us on 0113 804 2125. But I hope that's been of some use to you, and good luck with your campervan conversion project.