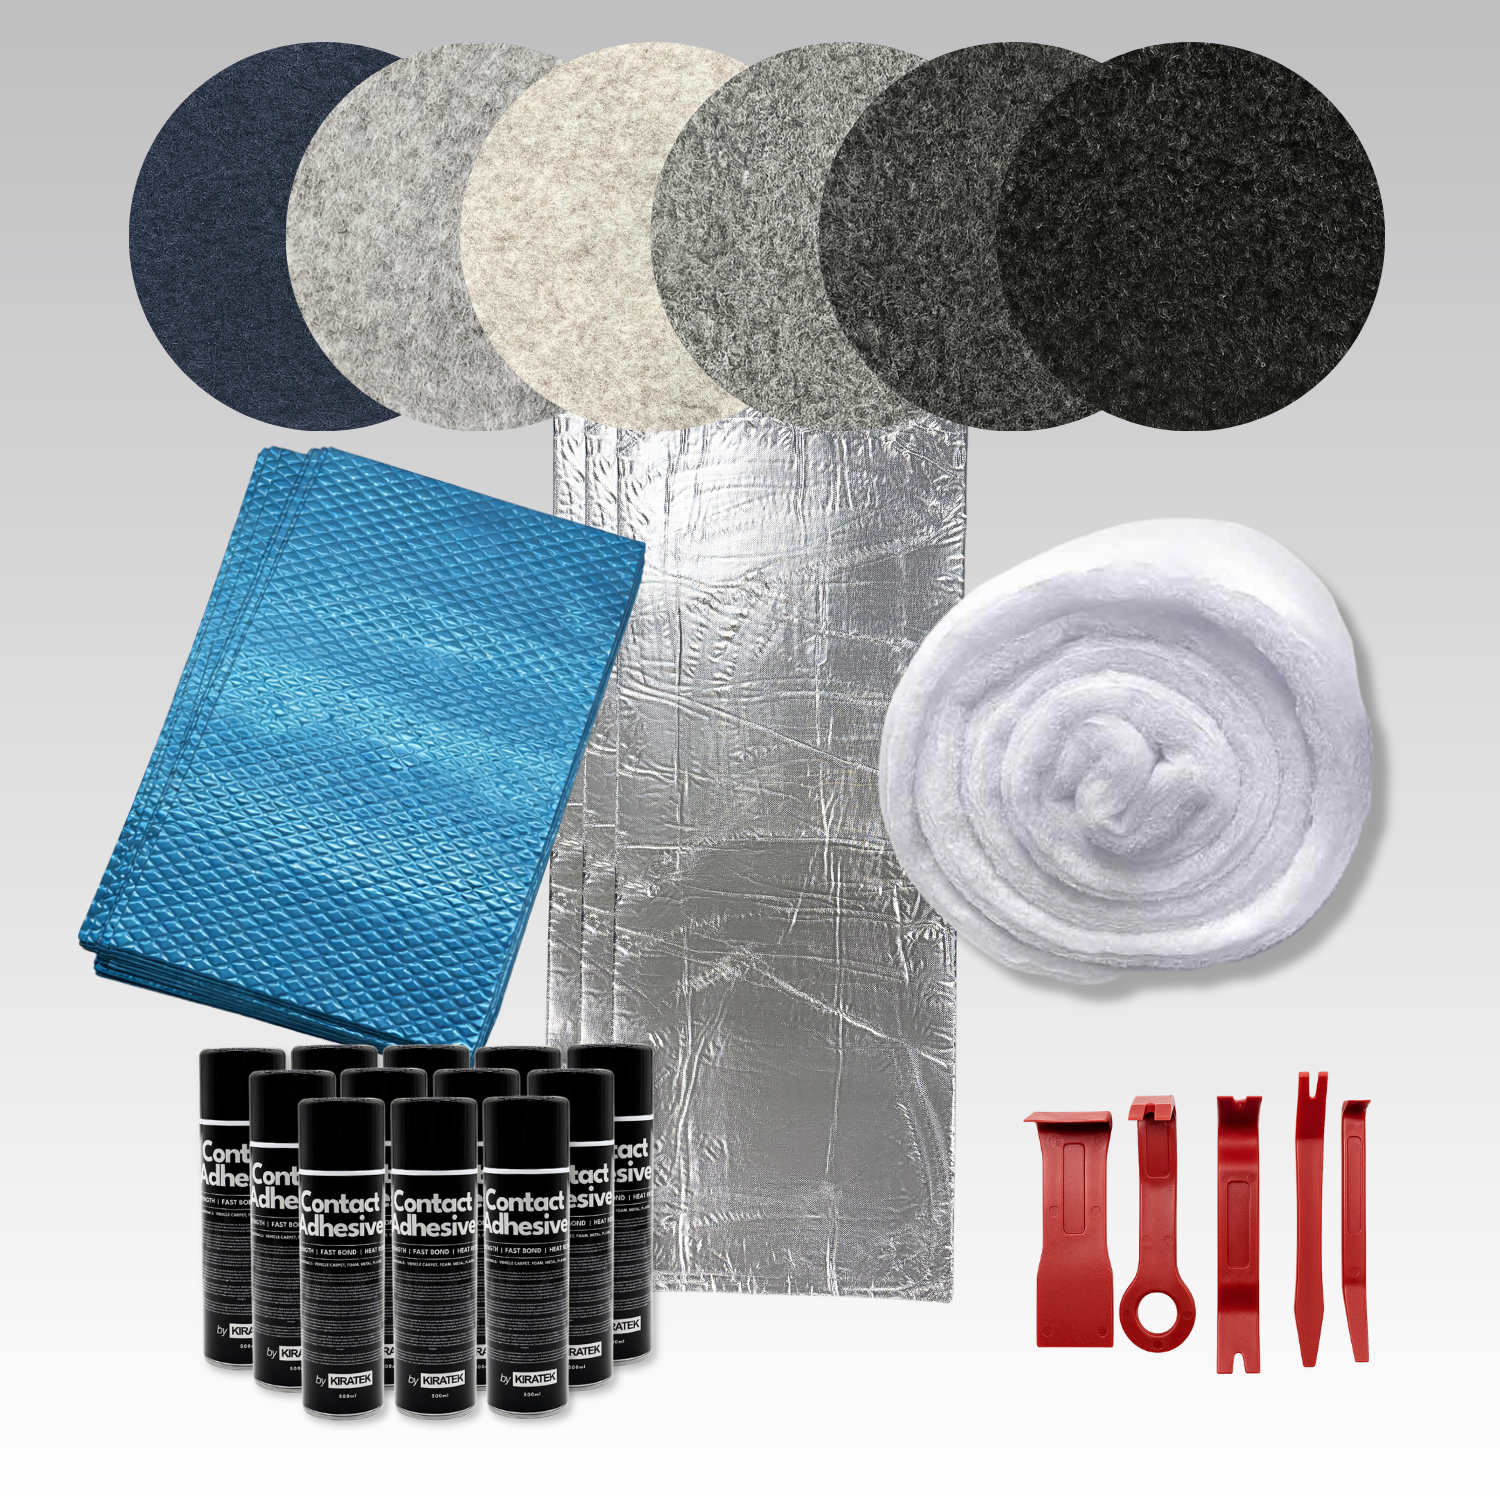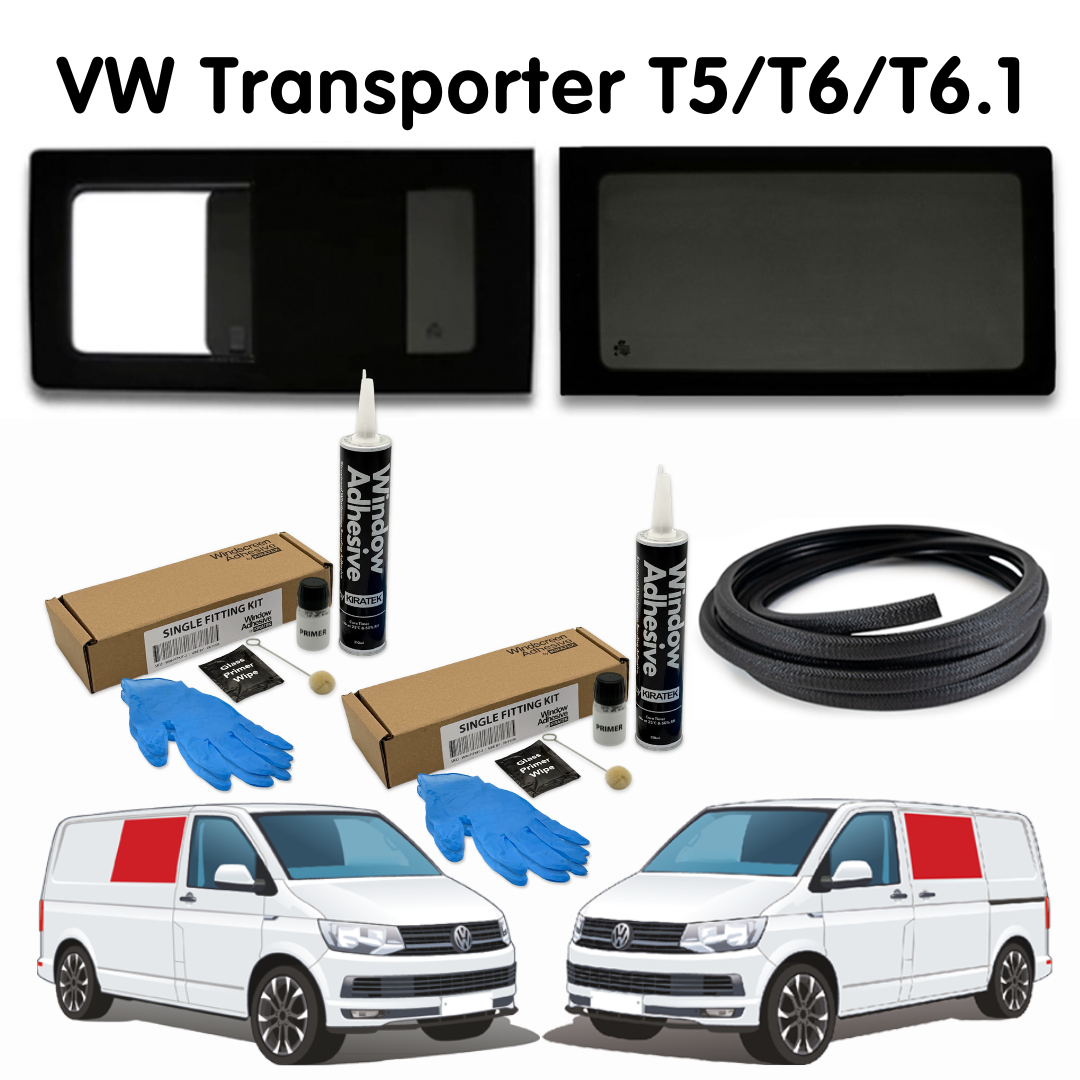
We stock everything you need to line your campervan. Click here to view all products
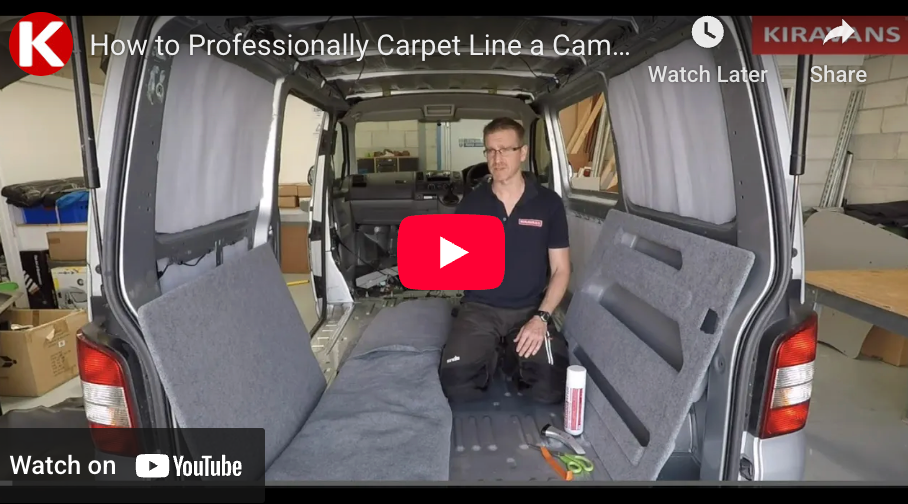
Video transcript
- Hey folks, welcome back to stage four in the lining process. So this is the exciting bit, this is where you get to stick the carpet lining on the inside of your van to make it look really good. So I'm going to do the normal format, bit of explanation and then a time lapse video of me carpet lining this van, and then we'll see what it looks like at the end.
So I've got 10 meters of stretch carpet here. I've already carpet lined my door store for the sliding door. I've carpet lined these four millimeter plywood panels, so they're ready to just screw straight on, one there, one each side here, one for the tailgate.
So I'm going to start off on this side and it's a very simple process. You get your high temperature adhesive, spray it on the metal work where you want the carpet to stick, spray it on the back of the carpet and then just press it on and you work it into the corners so that it molds to the metalwork. You probably go through quite a few Stanley blades so you'll need a few of those 'cause the carpet does blunt your knives. And some kind of little tool, hard tool to work into the corners is useful. And that's basically it, it's just going to take a bit of time. So we'll crack on and I'll show you how I get on.
So we're starting off by removing the rubber door seals from the back door and the side door. These just simply pull off. And then like all these sticking jobs, you want to make sure your metal work is nice and clean. So I'm using a degreasing agent to wipe it all down. Make sure there's no dust or any residue left on there.
Now a little bit of cardboard is handy here just to prevent any over-spray. Starting off at the top and spraying the metal work down to about halfway on this one. And we get our carpet and I'm just going to spray this top foot or so. And we're going to start hanging it like that. I've left a bit of extra carpet at high level so that you've got enough when you get to the back doorframe that when you try to patch it in, it's going to look okay.
Working around the window here. Not putting in too much detail at the minute 'cause I want to make sure the whole bit of carpet falls nice and flat. If you start too much detail in one corner without making sure the whole length is stuck at the top, you can end up with a nasty crease in it. Now I'm working around this window detail. You'll see I've cut an X just to release some pressure but always be careful not to cut too far at this stage, 'cause as you work into corners, that cut gets closer and closer to the corner and you don't want to leave yourself short of material. So I work that in there now.
Now going towards the back of the van and anytime I need a bit more glue, I just go under the carpet. Spray it onto the metalwork and spray it onto the back of the carpet. And just keep working like that. And you've got plenty of time with this glue, it doesn't matter if you spray an area and then leave it and go off and do another bit for five minutes. You can still come back and it'll still stick. And if you get a bit wrong, you get a wrinkle, you can pull it back off, spray some more glue on and have another go at it.
So I'm focusing on the wheel arch here. I haven't stepped on either side of the wheel arch, so there's still plenty of extra carpet to work with. And start in the middle, top of the wheel arch, work your way around, pushing in the details, working in with your little hard tool and your fingers. If you get any wrinkles, just pull gently down on the carpet, it'll stretch and it'll actually sort out any errors for you on its own. And then as you get into the real tight corner bits, you can put cuts in towards the corner. Again, don't go too close, but it will relieve some of the pressure on the carpet to let you work in those finer details.
So the wheel arch is done and now I'm going to finish the area in front of it. Just removing excess as I go. Just removing the excess from the front door pillar. Now remember, you're going to have your plastic trims to go back on here, so as long as you leave yourself 10 or 20 mil overlap, that'll tuck in behind your trim. And then same with the roof panels as well, leave yourself with extra up there.
Now working back around the rear-door pillar. Same process. You'll notice I've cut off the excess but I've left myself plenty to make sure I haven't left myself short. And then just work that round the corner. Stretching as we go. And I'm just using the back of pair of scissors here to work into the details. Just going to come along the floor, you don't need to go right along the floor. This far, I've got a full width threshold plate to go on here, which will cover that. And then just trim right down the edge of the metal work on the rear door pillar, and then when you put your rubber seal back on again, it'll be a really neat finish. So just finishing off in this corner here. And that is that side pretty much done.
Don't forget, I've got carpeted panels to go on here. So now I can remove the excess from behind them. I'm going to put some seat belts in here 'cause this is a Kombi van, so they're going to go in those middle of voids. And then if I take this excess material out of here, it'll let the airflow come through the panel to the slam vent, which is really useful when you want to shut the doors. And then it's basically repeat the process on the other side.
So I've speeded this up even more so we're not here all day watching this. But it's really nice to see the process from beginning to end so I'll let this run. It's quite a lot of extra material you can take out here. I think a chunk I take out from this sliding door area, I use to go across the top of the rear door towards the end of the video. Taking that extra off at the top there and then working again around the rear area and the wheel arch.
Now it is possible to do your wheel arches separately, but to be honest, it doesn't really make the job any easier, it just means you've got a few more cuts to match in. So if you can do it this way, I think you'll end up with a better result. And then obviously on the wheel arch on the passenger side, you've got the little raised up screw point where the jack gets located just here. So if you cut an eye section there, you should be able to tuck the carpet in underneath that and match it in quite neatly. And then just finishing off same on the rear door pillar here. And right down to floor level. And then get your rubber trims back on again, you may need your trim tool just to tuck in the carpet as you knock it on.
Now we've obviously got a section at high level here to finish off so I've made my two cuts equal distance from the corners on each side. Put a bit of masking tape just over the end of the carpet so that I don't get any spray glue on the actual carpet, but I can spray right up to the cut. Make sure my material is wide enough to get right across. Get some glue on that. Take off my masking tape. Put the carpet on.
Now this is obviously far too big so get it stuck on and then trim away any excess. And then actually matching in the cut is really just a, it's just a matter of being really careful, get a really sharp new Stanley blade. Just work slowly. Try and follow the line of the existing cut on the metal work and match it in as best you can. And if you take your time, you'll get a pretty good job here. Should you find that you make a mistake and you cut a bit too much off, you can cut a small patch and stick it in and it'll be almost invisible. And then just finishing off with the rubber door seal on the back door for a really neat finish. Now obviously at floor level, you can get a new full-width tread plate for the threshold which will cover up the ends of your carpet.
Now I just want to show you quickly carpet lining the panels. This is the door store getting carpet lined. There is a separate video available in the Kiravans site, showing a little bit more detail on how to do this. It's totally optional, you can put it in in the stock plastic or you can carpet line it.
And then this is the tailgate four-millimeter plywood panel. It's again very straightforward. This is just a quick overview of how it's done. And I've done this for all the other plywood panels on the van as well. And then it's simply a matter of screwing them in place. You've got the option here of using plastic clips or hidden clips, or what I've used is just steel screws, and they get lost really well in this light-coloured carpet. If you're using a darker carpet, you can get darker screws.
And for these rear panels here, just put a line in either side of that central rib. Put a little masking tape, mark either side and then you'll get your screws in the right place and then a nice neat row. And then finally get the door store popped back on with its panel clips.
Okay, that's the lining carpet done. This is a really good stage to get to in your van conversion. It's really rewarding to see it all come together. Time-wise, you probably want to give yourself a couple of days to do this job properly. Now there are two ways to do this. Obviously you can either put your wooden panels on first and then carpet line the whole thing, which gives you a slightly smoother look at the end of it, or you can do what I've done here and carpet line the panels and screw them on afterwards. This way gives you a little bit more flexibility if you're doing your van in stages and you want to come back later and put your wiring in for example.
Now in terms of how much carpet I used, this started off as a 10-meter-long roll. I think I used about three meters of length of that roll to carpet line these panels and the door store and the tailgate. And then that left me roughly, just a bit over three meters for each side. And then I used the chunk from the sliding door to do this section up here. So that's the 10 meters gone. Obviously, if you do the whole thing in a oner without doing these separately, you will have more carpet left over. You'll probably have enough left over to do the roof panels if you want to do those in the same colour.
Obviously, you can get new full-width threshold panel like this which is going to cover up both ends of the carpet and do a really neat finish. And if you got a barn door van, you can get a slightly different model but it will go that way across. And also you can get yourself a new step, which I'm going to do for this van because this is going to have a floor put in next which is going to raise it up slightly. I'm going to put back the original roof panels. And I've mentioned these slam vents.
So I've just left a couple of little holes in the back of these panels here which if all your doors are shut and you try and slam the tailgate, for example, the air that's trapped inside has got to go somewhere, otherwise the door doesn't really shut very well. So it'll go right through those. And I've left some spaces in this, in the insulation, and then the little slam vents are down in the bottom of the bumpers so the air can escape. So you can do that as well if you want.
Apart from that, that's this stage finished. I'm going to crack on with the floor next and we'll get this van finished as quick as we can. Alright, thanks for watching and I'll see you next time.