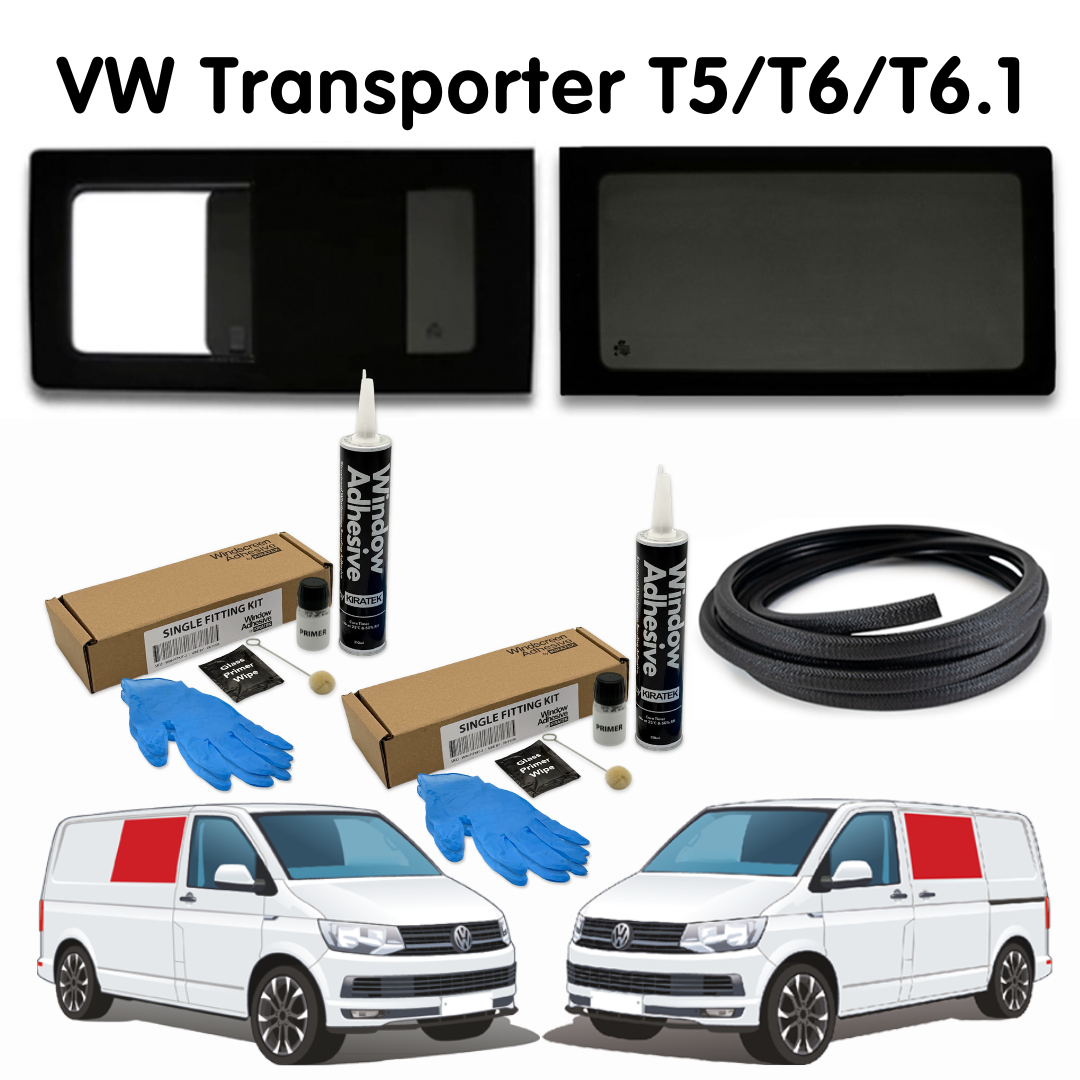
If you’re embarking on a campervan conversion then you’ll seriously want to consider adding some bonded campervan windows in your panel van. Adding some glass will give your conversion a good source of natural light so you can enjoy the views and it will also give you some much needed ventilation.
In today’s spotlight, we want to show you how easy it is for you to install a Kiravans VW T5 privacy window in 9 simple steps. We’ve also got a really useful ‘How to’ installation video for you to watch later on, where Mike shows you exactly how to prepare and fit your van window and gives you some really useful hints and tips along the way.
Step 1 - Check and clean your windows
It’s really important that you carefully unbox and check your windows before you cut any holes in your van!
To do this you’ll need to take off the protective plastic wrapping then get some window cleaning agent and give them a good clean on both sides. This will enable you to give them a thorough check and make sure there are no defects before you fit your glass. If there are any spots of adhesive on the glass this can be easily removed with a degreasing agent.

Step 2 - Protect your van
Use a sheet of polythene and some masking tape to protect your paintwork below where the window will be fitted. Then around the edges of where you will cut out your window openings, use a double layer of masking tape to be cautious and ensure that no exposed paintwork can get scratched in the process.

Step 3 - Cut holes in your van!
First of all check both sides of the panel that you will be removing to make sure you’re not going to cut through any pipes or wires.
Inside the van, you’ll need to mark a straight line across the top and bottom of the central strut, take your mini grinder and cut out the top and bottom section of the strut.

Mark a dot in the four corners of the metal panel (about 10mm in from each corner) and drill a hole through the panel from inside the van to outside. Then go outside the van and with a permanent marker pen and straight edge, mark a line from dot to dot. The joined lines will mark the rectangle for using the jigsaw to cut out the bulk of the metal panel.


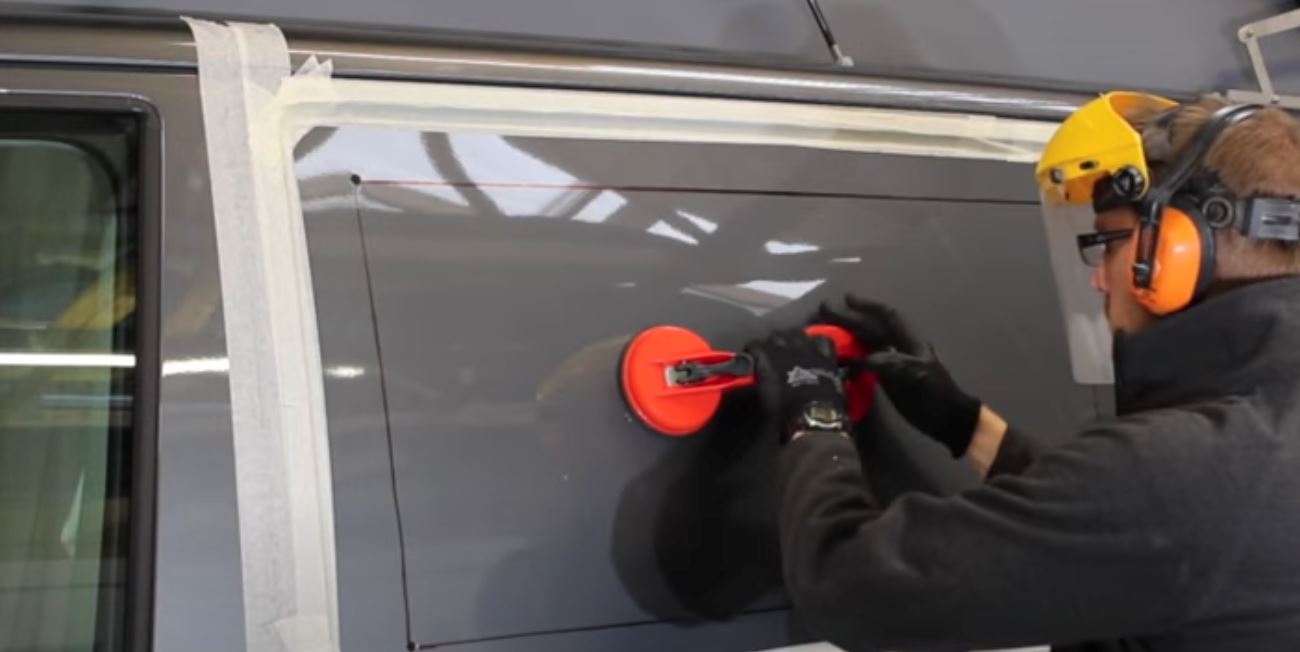
Now’s the time to get your goggles, gloves and ear defenders on!
Place your glass suction pad in the middle of the metal panel to stop it from falling and causing any damage when you cut along the marked lines. Cut each straight line but stop about 5mm short of each drilled hole so that the panel corners remain secure at this stage. It can get tricky cutting round the corners, but as you do cut carefully through the holes you’ll be able to stop the panel from falling by using the glass suction pad.

Once the panel has been removed you’ll be left with an inch or two of metal remaining all the way round. This needs to be removed either with an angle grinder, metal cutting power shears or a jigsaw, keep checking inside the van and follow the line of the inner skin of metal. Once you have finished cutting your window opening, take off any high spots with a mini grinder and give it a light rub down with some sandpaper.
The following two photos show a way in which you may find it easier to cut the corners if you’re using a jigsaw.

Step 4 - Rust proofing and fixing the window trim
Next thing we've got to do is rust proof that metal window edge so that it doesn't start to corrode. Primer with a dabber is a great way to seal it all in and make sure that no corrosion is going to occur.

Then it’s time to add the knock on edge trim. Choose a thick window trim which avoids you having to cut out the rubber pinch wells between the two metal skins.

Step 5 - Preparing to bond your van window
Now we're ready to start prepping the van for bonding. It is important to remove any dirt, polish or residue to get a good bond.
Use a degreasing agent all the way round the paintwork where the primer is going.
Get your primer and apply it to the bonding area, following the line of the knock on trim. Apply one clean application of primer rather than multiple layers to ensure a clean, even bed of primer for the adhesive.
Add an extra arc of primer (above the existing line of primer) in the top corner where the adhesive is going to overlap to create a waterproof seal.

Step 6 - Applying glass activator
Next, we are going to use the glass activator and give that a decent wipe all the way around on the ceramic band of the window. The activator solution will enhance the bonding surface of the window and help to activate the adhesive on contact.

Now is a really good time to dry fit your windows to make sure there are no high spots in the framework, which may affect the flush fit of the window.

If there are any raised spots then simply tap the bodywork with a rubber mallet to make sure it’s flat.

Step 7 - Final preparations and applying window primer
Prepare to fix your window in place by attaching a couple of loops of ‘non-stretchy’ tape to the top of the van. The idea is that the tape will hold your window in place whilst the adhesive sets.
Offer your window up to the van and get it roughly in place. You want to try and get the gap top and bottom of the window to be about equal. Also if you are fitting two windows side by side you need the gap between each window to be as equal as possible.

Go back inside the van, take a pencil and draw a line around the inside of the window opening onto the back of the window. When you remove the window the line will show you where to apply your primer.

Then take a piece of spare edge trim and place it on your frame so that you can gauge how far outside the line your adhesive needs to go.

Paint a continuous line of primer just outside the pencil line, leaving the gap for the window trim. Using the pencil line as a guide means you won’t have any visible primer on show inside your van or on your glass.

Step 8 - Stick the window to your van!
Next, load up your mastic gun so that you can start bonding your window in place. Mike shows you how to do this in our window fitting video but let’s crack on with the main job in hand...fixing the window in place.
If you’re doing the job in colder months then a valuable tip is to get your glue cartridge up to room temperature so it’s easier to squeeze out of the mastic gun.
It’s time to start applying a continuous bead of adhesive to the van. Keep the adhesive nozzle right up against the knock-on window trim.


Offer up the window and make sure it’s aligned as best you can.
You can use the tape loops to loosely secure the window whilst you’re aligning it to keep it in place. Aim for a uniform gap all the way around the window.
Once you’re happy with the position, start to press evenly and firmly all the way around the window to make sure the whole window gets in contact with the adhesive.

Please be careful not to slam the van doors whilst the adhesive sets as this could blow the windows out :(
Step 9 - Time for a brew :)
Once the windows are in place, pop the kettle on and leave them for a couple of hours whilst the adhesive sets...
Congratulations, you’ve done it! You’ve successfully fitted your campervan windows and now you can drive away and enjoy the views :)


Now watch our useful installation video - ‘How to Fit Van Windows into a VW T6 SWB’ to see Mike in action.
We have a great selection of products suitable for all of your window fitting needs on your VW T5/T6, Trafic/Vivaro and Ford Transit Van conversion including tools, window trim, bonded tinted privacy windows and really useful window fitting kits that have everything you need to do the job properly.